

Running the LiveDVD
The workshop data and material is provided through the LiveDVD shipped with this documentation. The LiveDVD runs an instance of XUbuntu 9.10 customized for the workshop, containing the following software:
GDAL libraries and FWTools 2.0.6
Note
FWTools is a set of GIS utilities for handling and manipulation of GIS data. FWTools includes OpenEV, GDAL, MapServer, PROJ.4 and OGDI as well as some supporting components.
An instance of GeoServer 2.1.x configured with some datasets and extensions, like RESTConfig, ImageMosaic, ImagePyramid, Chart Dynamic Symbolizer. This instance will be used in the GeoServer chapter of this workshop.
Note
Running GeoServer requires a Java Development Kit (JDK), not just a Java Runtime Environment (JRE).
An instance of GeoBatch configured to run the data flows for ingestion, processing and publication.
An instance of GeoStore as a data and metadata repository.
An instance of the latest GeoServer 2.2.x configured for UNREDD data dissemination.
The Administration interface and the Portal user interface, used respectively to control the dissemination process and to display the resulting outcome to the users.
The most popular GIS clients like GoogleEarth 6.2, uDig 1.3.1 and QGis 1.8.0
Launch the LiveDVD
The LiveDVD contains a fully functional version of Xubuntu 9.10. It can start automatically running directly from the DVD or can also be installed on the system, PC or Virtual Machine (see the next section).
In order to launch the LiveDVD the steps to do are the following:
Make sure the boot sequence on your PC allows to check CD/DVD or USB before HD
- First you must start your computer. During the boot process, usually on the first or second screen your monitor displays, you will be able to see a message such as “press f8 for set up” or “press ctrl-alt-del to enter setup”. Different machines require you to enter CMOS setup in different ways but your individual computer should given you a hint of how that is done in the boot screens.
- Once inside BIOS/CMOS setup you are going to to explore the environment. Usually the arrow keys will allow you to move between utilities but your computer may require you to use additional keys or a different set of keys altogether. Therefore it is important you familiarize yourself with your version of CMOS before making any changes.
- Now that you’re a little more comfortable with CMOS go ahead and browse through the entries until you see the boot sequence. Select this utility and change it according to what sequence you wish to put in place (make sure to move the DVD/USB key on top of the list to make the machine boot from them instead of booting from the local hard drive).
- Finally double check what you have done to ensure you made the correct choices. Save your new sequence and press the Esc key when you are done. This should bring you back to boot up and depending on the changes you made it may be required to restart the computer to enable the changes you just made.
Make sure the DVD is correctly inserted in the DVD-ROM Reader before PC boot sequence.
When the computer starts you should see a choice screen like the following:
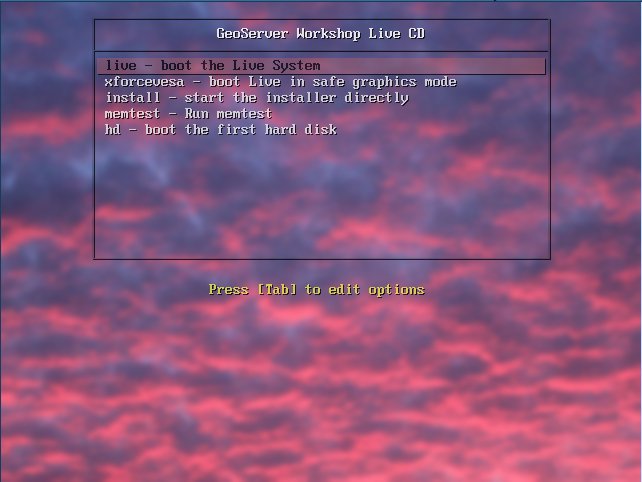
First LiveDVD boot
Press ENTER or type ‘live’ and press ENTER to startup the system from the DVD.
Note
Ignore the other options for now, we will inspect them in the next section.
If the LiveDVD runs correctly with no errors, you should see at the end the Xubuntu GNOME GUI.