

Styling Raster data
In the previous section we have created and optimized some vector styles. In this section we will deal with a styled SRTM raster and we will see how to get a better visualization of that layer by adding hillshade.
From the Welcome Page navigate to and select the OpenLayers link for the
geosolutions:srtmlayer.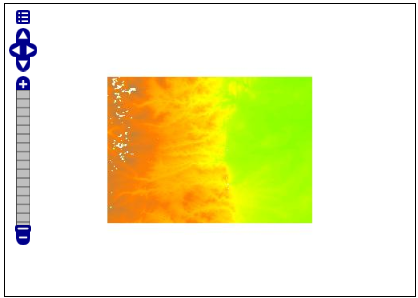
SRTM rendering with DEM style
There is a DEM style associated to that SRTM dataset layer, resulting in such a colored rendering.
Return to the GeoServer Welcome Page, select the and click the
demstyle to see which color map is applied.Note
You have to be logged in as Administrator in order to edit/check styles.
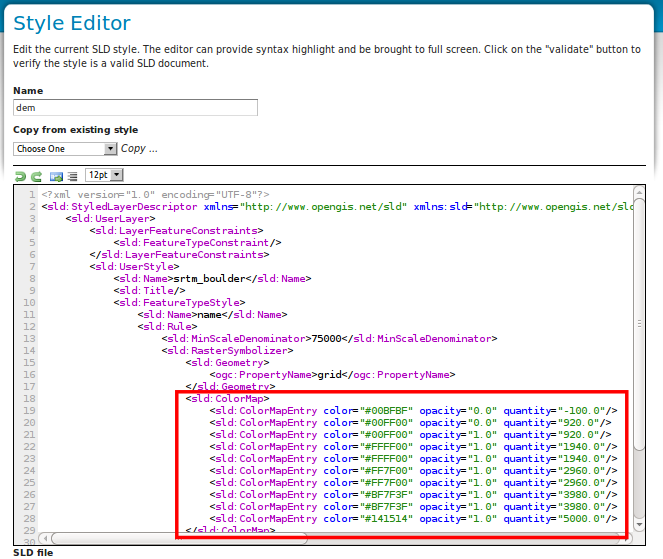
Style editing
Note the entries with
opacity = 0.0which allow to make no data values as transparent.
The current DEM style allows to get a pleasant rendering of the SRTM dataset but we can get better results by combining it with an hillshade layer which will be created through another GDAL utility (gdaldem).
Adding hillshade
Open a shell (CTRL+ALT+T) and run:
cd /home/unredd/geoserver_data/data/boulder

gdaldem hillshade -z 5 -s 111120 srtm_boulder.tiff srtm_boulder_hs.tiff -co tiled=yes
Note
The
zparameter exxagerates the elevation, thesparameter provides the ratio between the elevation units and the ground units (degrees in this case),-co tiled=yesmakes gdaldem generate a TIFF with inner tiling. We’ll investigate this last option better in the following pages.From the Welcome Page navigate to and select Add a new style as previously seen in the Adding a style section.
In the SLD Editor enter the following XML:
<?xml version="1.0" encoding="UTF-8"?>
<sld:StyledLayerDescriptor xmlns="http://www.opengis.net/sld" xmlns:sld="http://www.opengis.net/sld" xmlns:ogc="http://www.opengis.net/ogc" xmlns:gml="http://www.opengis.net/gml" version="1.0.0">
    <sld:UserLayer>
        <sld:LayerFeatureConstraints>
            <sld:FeatureTypeConstraint/>
        </sld:LayerFeatureConstraints>
        <sld:UserStyle>
            <sld:Title/>
            <sld:FeatureTypeStyle>
                <sld:Name>name</sld:Name>
                <sld:FeatureTypeName>Feature</sld:FeatureTypeName>
                <sld:Rule>
                    <sld:MinScaleDenominator>75000</sld:MinScaleDenominator>
                    <sld:RasterSymbolizer>
                        <sld:Geometry>
                            <ogc:PropertyName>grid</ogc:PropertyName>
                        </sld:Geometry>
                        <sld:ColorMap>
                            <sld:ColorMapEntry color="#000000" opacity="0.0" quantity="0.0"/>
                            <sld:ColorMapEntry color="#999999" opacity="0.7" quantity="1.0"/>
                            <sld:ColorMapEntry color="#FFFFFF" opacity="0.7" quantity="256.0"/>
                        </sld:ColorMap>
                    </sld:RasterSymbolizer>
                </sld:Rule>
            </sld:FeatureTypeStyle>
        </sld:UserStyle>
    </sld:UserLayer>
</sld:StyledLayerDescriptor>
Note
Note the opacity values being less than 1, in order to made it partially transparent which will allows to do overlaying on other layers
Set
hillshadeas name and then click the Submit button.Select Add stores from the GeoServer Welcome Page to add the previously created
hillshaderaster.Select GeoTIFF - Tagged Image File Format with Geographic information from the set of available Raster Data Sources.
Specify
hillshadeas name in the Data Source Name field of the interface.Click on browse link in order to set the GeoTIFF location in the URL field.
Note
make sure to specify the
srtm_boulder_hs.tiffpreviously created with gdaldem, which should be located at/home/unredd/geoserver_data/data/boulderClick Save.
Publish the layer by clicking on the publish link.
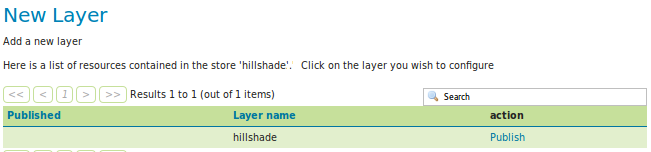
Publishing Raster Layer
Set
SRTM Hillshadeas TitleSwitch to Publishing tab
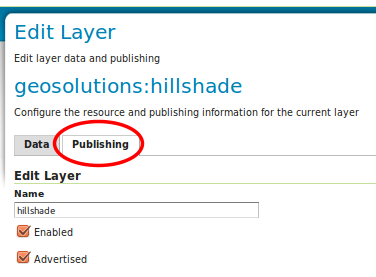
Make sure to set the default style to
hillshadeon the Publishing –> Default Style section.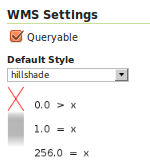
Editing Raster Publishing info
Click Save to create the new layer.
Use the Layer Preview to preview the new layer with the hillshade style.
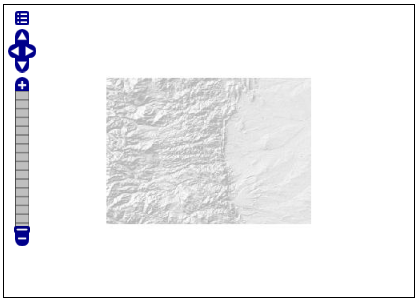
Previewing the new raster layer with the hillshade style applied
Edit the Layer Preview URL in your browser by locating the layers parameter
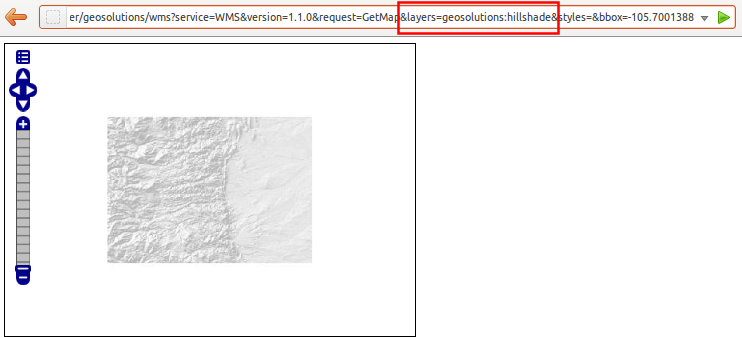
Insert the geosolutions:srtm, additional layer (note the final comma) before the geosolutions:hillshade one

Press Enter to send the updated request. The Layer Preview should change like this where you can see both the srtm and hillshade layers.
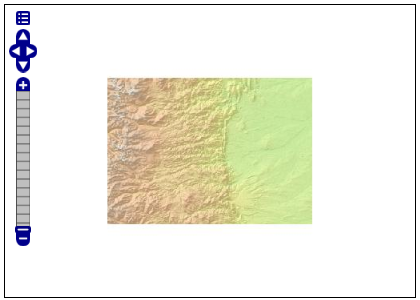
Layer preview with srtm and hillshade being overlaid